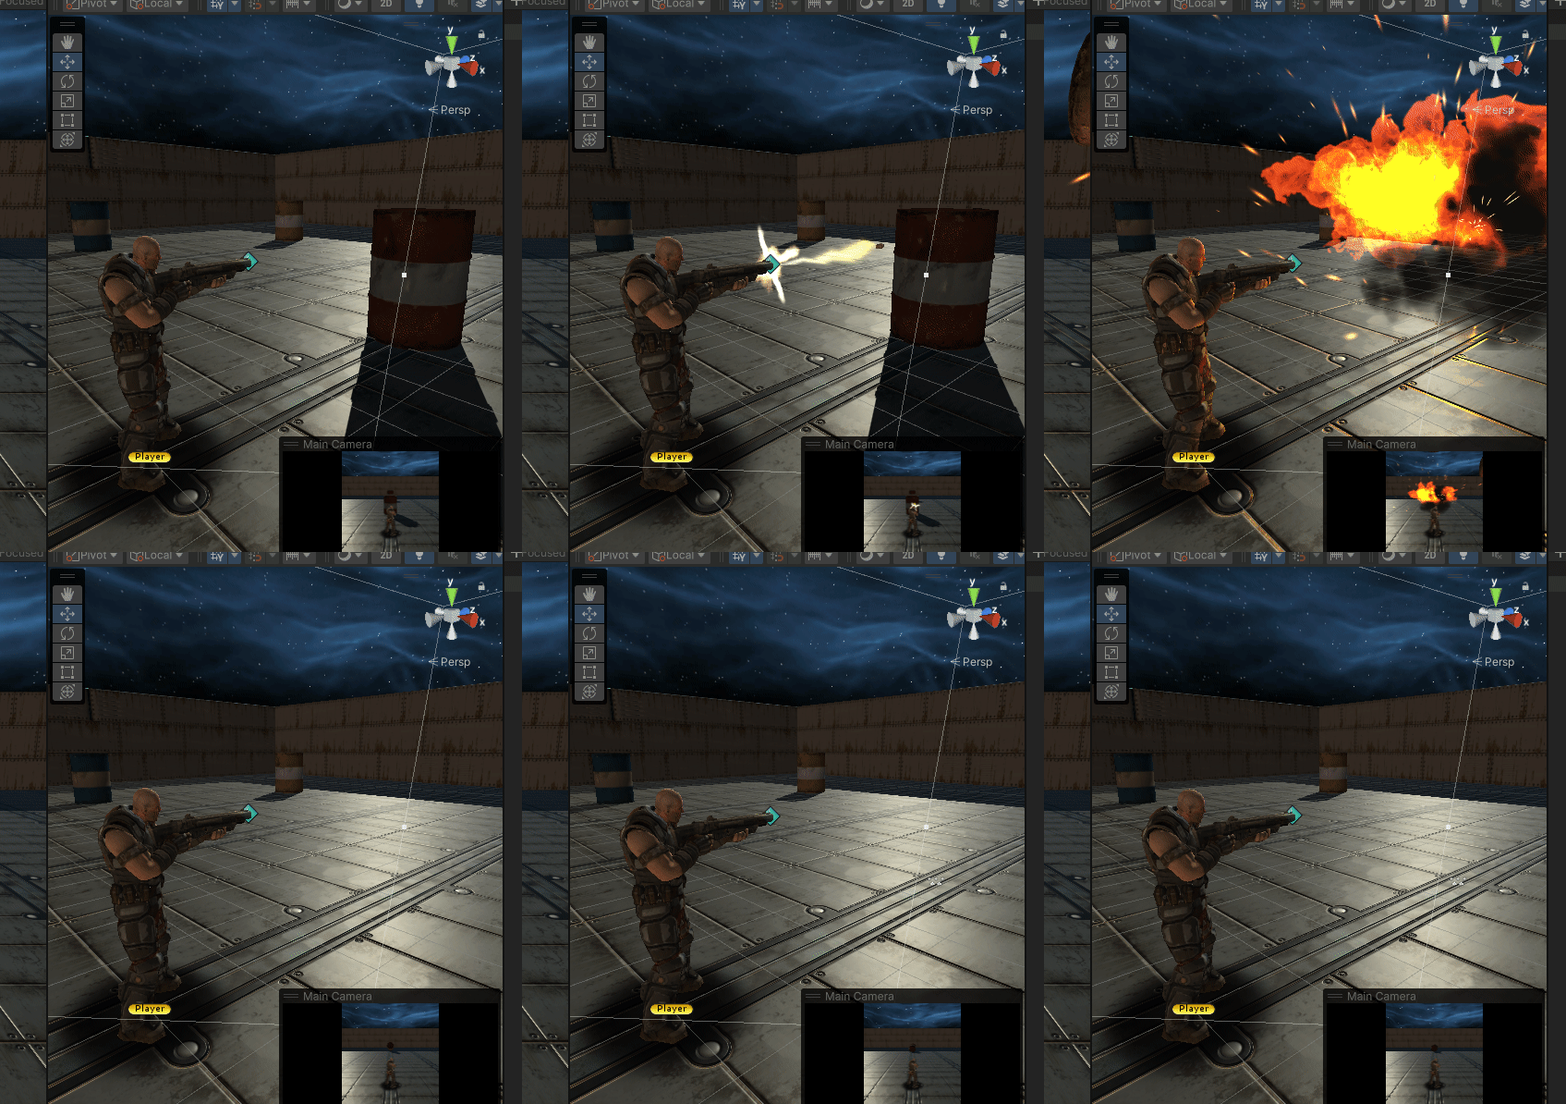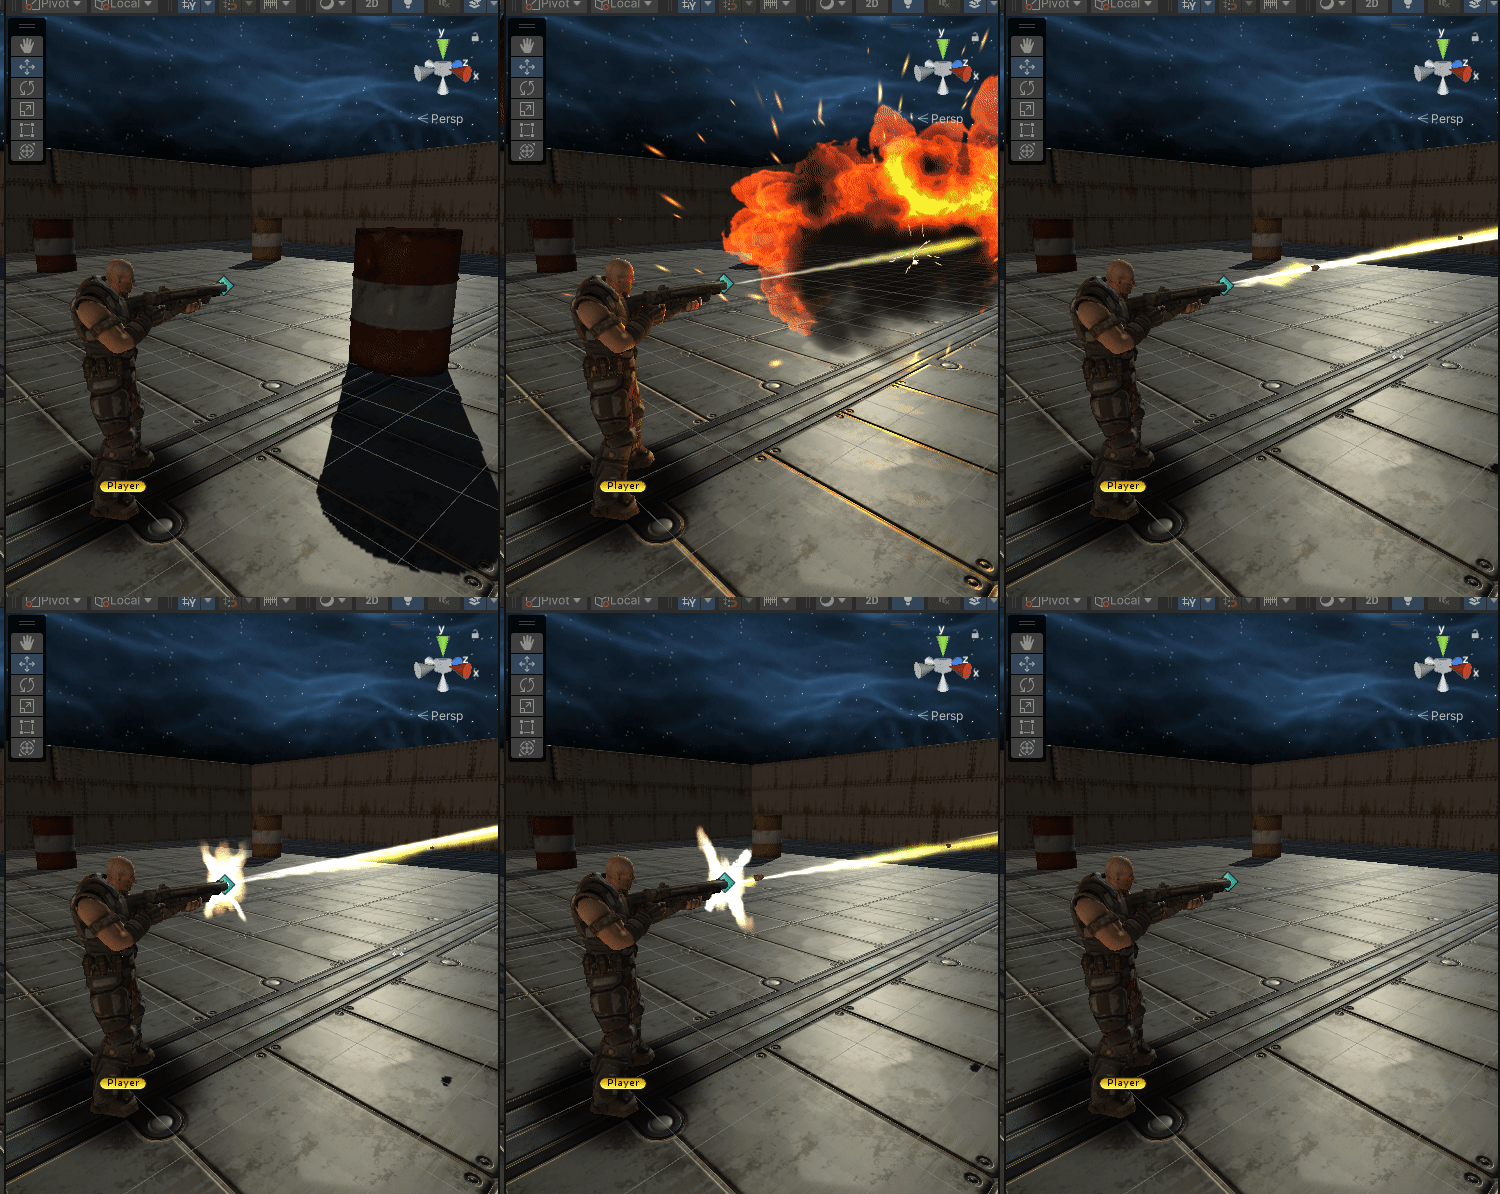
z축이 up이었던 모델을 z축이 forward방향이 되도록 함
총알 발사 위치
자식 생성하기(빈오브젝트) 단축기 shift+alt+n


run 상태에서 위치 변경 + Trasform-> copy->component
edit 모드에서 transfor-> paste
메시가 없는 빈 게임오브젝트는 씬 뷰에서 확인할 수 없고 선택할 수 없는 불편함을 해결하기 위해 스크립트로 생성하는 기즈모를 활용하는 방법과,유니티가 제공하는 icon 방법이 있다

왼쪽 마우스 클릭하면 총알발사
using System.Collections;
using System.Collections.Generic;
using UnityEngine;

public class FireController : MonoBehaviour
{
    //총알 프리팹
    public GameObject bullet;
    public Transform firePos;
    // Start is called before the first frame update
    void Start()
    {

    }

    // Update is called once per frame
    void Update()
    {
        if (Input.GetMouseButtonDown(0))
        {
            Fire();
        }
    }
    //앞으로 나가는건 bulletController에서 하고 있으니 생성만 하면됨
    void Fire()
    {
        Instantiate(bullet, firePos.position, firePos.rotation);
    }
}

총알 발사 궤적 효과 만들기- trail Renderer
스파크효과가 튀는 방향이 항상 일정함 quaternion.identity로 instantiate해서, 충돌한 지점에서 법선 벡터를 구해 해당 방향으로 스파크가 튀게 변경
using System.Collections;
using System.Collections.Generic;
using UnityEngine;

public class RemoveBullet : MonoBehaviour
{
    public GameObject sparkEffect;
    private void OnCollisionEnter(Collision collision)
    {
        if (collision.collider.CompareTag( "BULLET"))
        {
            ContactPoint cp = collision.GetContact(0);//첫번째 충돌지점
            Quaternion rot = Quaternion.LookRotation(-cp.normal);//normal은 충돌지점의 법선
            Instantiate(this.sparkEffect, cp.point,rot);//회전없이생성
            Destroy(collision.gameObject);
        }
    }
}
using System.Collections;
using System.Collections.Generic;
using UnityEngine;
public class RemoveBullet : MonoBehaviour
{
public GameObject sparkEffect;
private void OnCollisionEnter(Collision collision)
{
if (collision.collider.CompareTag( "BULLET"))
{
ContactPoint cp = collision.GetContact(0);//첫번째 충돌지점
Quaternion rot = Quaternion.LookRotation(-cp.normal);//normal은 충돌지점의 법선
GameObject spark=Instantiate(this.sparkEffect, cp.point,rot);//회전없이생성
Destroy(spark, 0.5f);
Destroy(collision.gameObject);
}
}
}
barrel 가져오기
크기가 너무큼 외부에서 임포트한 3d 모델은 transform의 scale을 조절하지 말고 scale factor속성을 수정하기!!!
이펙트는 looping이 여러군데 체크되어있어서 open editor에 들어가서 모두 언체크한다.총알 세발 맞으면 드럼통 파괴
using System.Collections;
using System.Collections.Generic;
using UnityEngine;

public class BarrelController : MonoBehaviour
{
    //폭발효과 파티클
    public GameObject expEffect;
    //베럴 위치
    private Transform tr;
    private Rigidbody rb;
    private int hitCount = 0;
    // Start is called before the first frame update
    void Start()
    {
        tr = GetComponent<Transform>();
        rb = GetComponent<Rigidbody>();
    }

    private void OnCollisionEnter(Collision collision)
    {
        if (collision.gameObject.CompareTag("BULLET"))
        {
            if (++hitCount == 3)//부딪히면 1씩 증가
            {
                this.ExpBarrel();
            }
        }
    }
    //드럼통 폭발시킬 함수
    void ExpBarrel()
    {
        //폭발 파티클 생성시킴
        GameObject exp = Instantiate(expEffect, this.tr.position, Quaternion.identity);
        //폭발 파티클 제거
        Destroy(exp,5.0f);

        //mass를 원래 20이었는데 1로 줄여서 가볍게 함
        rb.mass = 1.0f;
        //위로 솟구치면서 날라가는 효과
        rb.AddForce(Vector3.up * 1500.0f);

        //드럼통제거
        Destroy(this.gameObject, 3.0f);
    }
}
폭발 반경에 들어와 있는 주변 드럼통을 대상으로 폭발력 전달
layer, overlapSphere 사용
using System.Collections;
using System.Collections.Generic;
using UnityEngine;

public class BarrelController : MonoBehaviour
{
    //폭발효과 파티클
    public GameObject expEffect;
    public Texture[] textures;
    private new MeshRenderer renderer;
    //폭발 반경
    public float radius = 10.0f;
    //베럴 위치
    private Transform tr;
    private Rigidbody rb;
    private int hitCount = 0;
    // Start is called before the first frame update
    void Start()
    {
        tr = GetComponent<Transform>();
        rb = GetComponent<Rigidbody>();

        renderer = GetComponentInChildren<MeshRenderer>();
        //난수 발생
        int idx = Random.Range(0, textures.Length);
        renderer.material.mainTexture = textures[idx];
    }

    private void OnCollisionEnter(Collision collision)
    {
        if (collision.gameObject.CompareTag("BULLET"))
        {
            if (++hitCount == 3)//부딪히면 1씩 증가
            {
                this.ExpBarrel();
            }
        }
    }
    //드럼통 폭발시킬 함수
    void ExpBarrel()
    {
        //폭발 파티클 생성시킴
        GameObject exp = Instantiate(expEffect, this.tr.position, Quaternion.identity);
        //폭발 파티클 제거
        Destroy(exp,5.0f);

        //mass를 원래 20이었는데 1로 줄여서 가볍게 함
        //rb.mass = 1.0f;
        //위로 솟구치면서 날라가는 효과
        //rb.AddForce(Vector3.up * 1500.0f);
        IndirectDamage(tr.position);

        //드럼통제거
        Destroy(this.gameObject, 3.0f);
    }
    void IndirectDamage(Vector3 pos)
    {
        Collider[] colls = Physics.OverlapSphere(pos, radius, 1 << 3);//3번 레이어만 추출

        foreach(var coll in colls)
        {
            //범위내에 포함된 드럼통의 rigidbody 추출
            rb = coll.GetComponent<Rigidbody>();
            rb.mass = 1.0f;
            //freezerotation했던거 해제
            rb.constraints = RigidbodyConstraints.None;
            rb.AddExplosionForce(1500.0f, pos, radius, 1200.0f);//횡폭발력(가로), 폭발원점, 폭발반경, 종 폭발력(위로 솟구치는힘)
        }
    }
}
음향 효과
AudioListener은 씬에서 반드시 한개만 존재해야한다. (Main Camera에 기본 컴포넌트로 추가되어있음)
AudioSource는 여러개 존재 가능
Muzzle Flash 구형( 총 발사할때 총구 화염 효과)
일반적인 함수를 호출하면 해당 함수 안의 로직을 다 수행해야만 실행이 끝남, 이를 해결하는게 멀티 스레드인데 유니티에서는 멀티 스레드와 같이 비동기로 처리해야하는 로직을 구현하기 위해 멀티 스레드와 유사한 코루틴을 제공한다.
yield키워드를 만나면 제어권한을 유니티의 메인 메시지 루프로 양보한다. yield return null은 다음 프레임까지 해당 코루틴을 잠시 대기하는동안 메인 메시지 루프로 제어권을 넘겨 다른 작업을 처리하라는 의미이다.
yield return null 대신에 yield return new WaitForSeconds를 사용해 일정 시간을 지연시킬 수 있다.
using System.Collections;
using System.Collections.Generic;
using UnityEngine;

public class FireController : MonoBehaviour
{
    //총알 프리팹
    public GameObject bullet;
    public Transform firePos;

    private MeshRenderer muzzleFlash;
    // Start is called before the first frame update
    void Start()
    {
        muzzleFlash = firePos.GetComponentInChildren<MeshRenderer>();
        //처음 시작할때 비활성화
        muzzleFlash.enabled = false;
    }

    // Update is called once per frame
    void Update()
    {
        if (Input.GetMouseButtonDown(0))
        {
            Fire();
        }
    }
    //앞으로 나가는건 bulletController에서 하고 있으니 생성만 하면됨
    void Fire()
    {
        Instantiate(bullet, firePos.position, firePos.rotation);
        StartCoroutine(ShowMuzzleFlash());
    }

    IEnumerator ShowMuzzleFlash()
    {
        muzzleFlash.enabled = true;
        yield return new WaitForSeconds(0.2f);
        muzzleFlash.enabled = false;
    }
}
총구 화염 비활성화였다가-> fire(즉 마우스 왼쪽버튼 누르면)-> 활성화됐다가 0.2초뒤에 -> 다시 비활성화-> 마우스 다시 누를때까지 계속 비활성화

MeshRenderer만 활성화 비활성화로는 부족-> MuzzleFlash에 연결한 Texture의 오프셋을 불규칙하게 변경하고, 뷸규칙적인 각도로 회전시키고 크기도 조절하면 더 실감이 난다.
using System.Collections;
using System.Collections.Generic;
using UnityEngine;

public class FireController : MonoBehaviour
{
    //총알 프리팹
    public GameObject bullet;
    public Transform firePos;

    private MeshRenderer muzzleFlash;
    // Start is called before the first frame update
    void Start()
    {
        muzzleFlash = firePos.GetComponentInChildren<MeshRenderer>();
        //처음 시작할때 비활성화
        muzzleFlash.enabled = false;
    }

    // Update is called once per frame
    void Update()
    {
        if (Input.GetMouseButtonDown(0))
        {
            Fire();
        }
    }
    //앞으로 나가는건 bulletController에서 하고 있으니 생성만 하면됨
    void Fire()
    {
        Instantiate(bullet, firePos.position, firePos.rotation);
        StartCoroutine(ShowMuzzleFlash());
    }

    IEnumerator ShowMuzzleFlash()
    {
        Vector2 offset = new Vector2(Random.Range(0, 2), Random.Range(0, 2)) * 0.5f;
        muzzleFlash.material.mainTextureOffset = offset;

        float angle = Random.Range(0, 360);
        muzzleFlash.transform.localRotation = Quaternion.Euler(0, 0, angle);

        float scale = Random.Range(1.0f, 2.0f);
        muzzleFlash.transform.localScale = Vector3.one * scale;

        muzzleFlash.enabled = true;
        yield return new WaitForSeconds(0.2f);
        muzzleFlash.enabled = false;
    }
}
mainTextureOffset은 아래의 4개의 좌푯갑 중 하나를 랜덤하게 추출한다.
Random.Range(0,2)는 0,1중에 랜덤하게 나오고 0.5를 곱한다.


'유니티 심화' 카테고리의 다른 글
| 유니티 절대강좌 07 (유니티 UI 시스템) (0) | 2023.10.04 |
|---|---|
| 유니티 절대강좌 06 (적 캐릭터 제작) (0) | 2023.09.27 |
| 유니티 절대강좌 챕터4(주인공 캐릭터 제작) (0) | 2023.09.26 |
| 유니티 절대강좌 챕터3 (0) | 2023.09.25 |
| UIPlayResult (0) | 2023.09.12 |


